Building the Rig
If you are interested in building a RIG for your camera or DSLR, you should consider these basic rules to help you build it.
- First of all what you need to know is - what camera you have, how you will use it and for what a purpose.
- How you will use it means mainly whether you plan to use it on a tripod, in a hand, on a shoulder or on some stabilization device. Each single use has its own specifics, such as the way, the camera is attached and how the cameraman will hold it and how he will work with it.
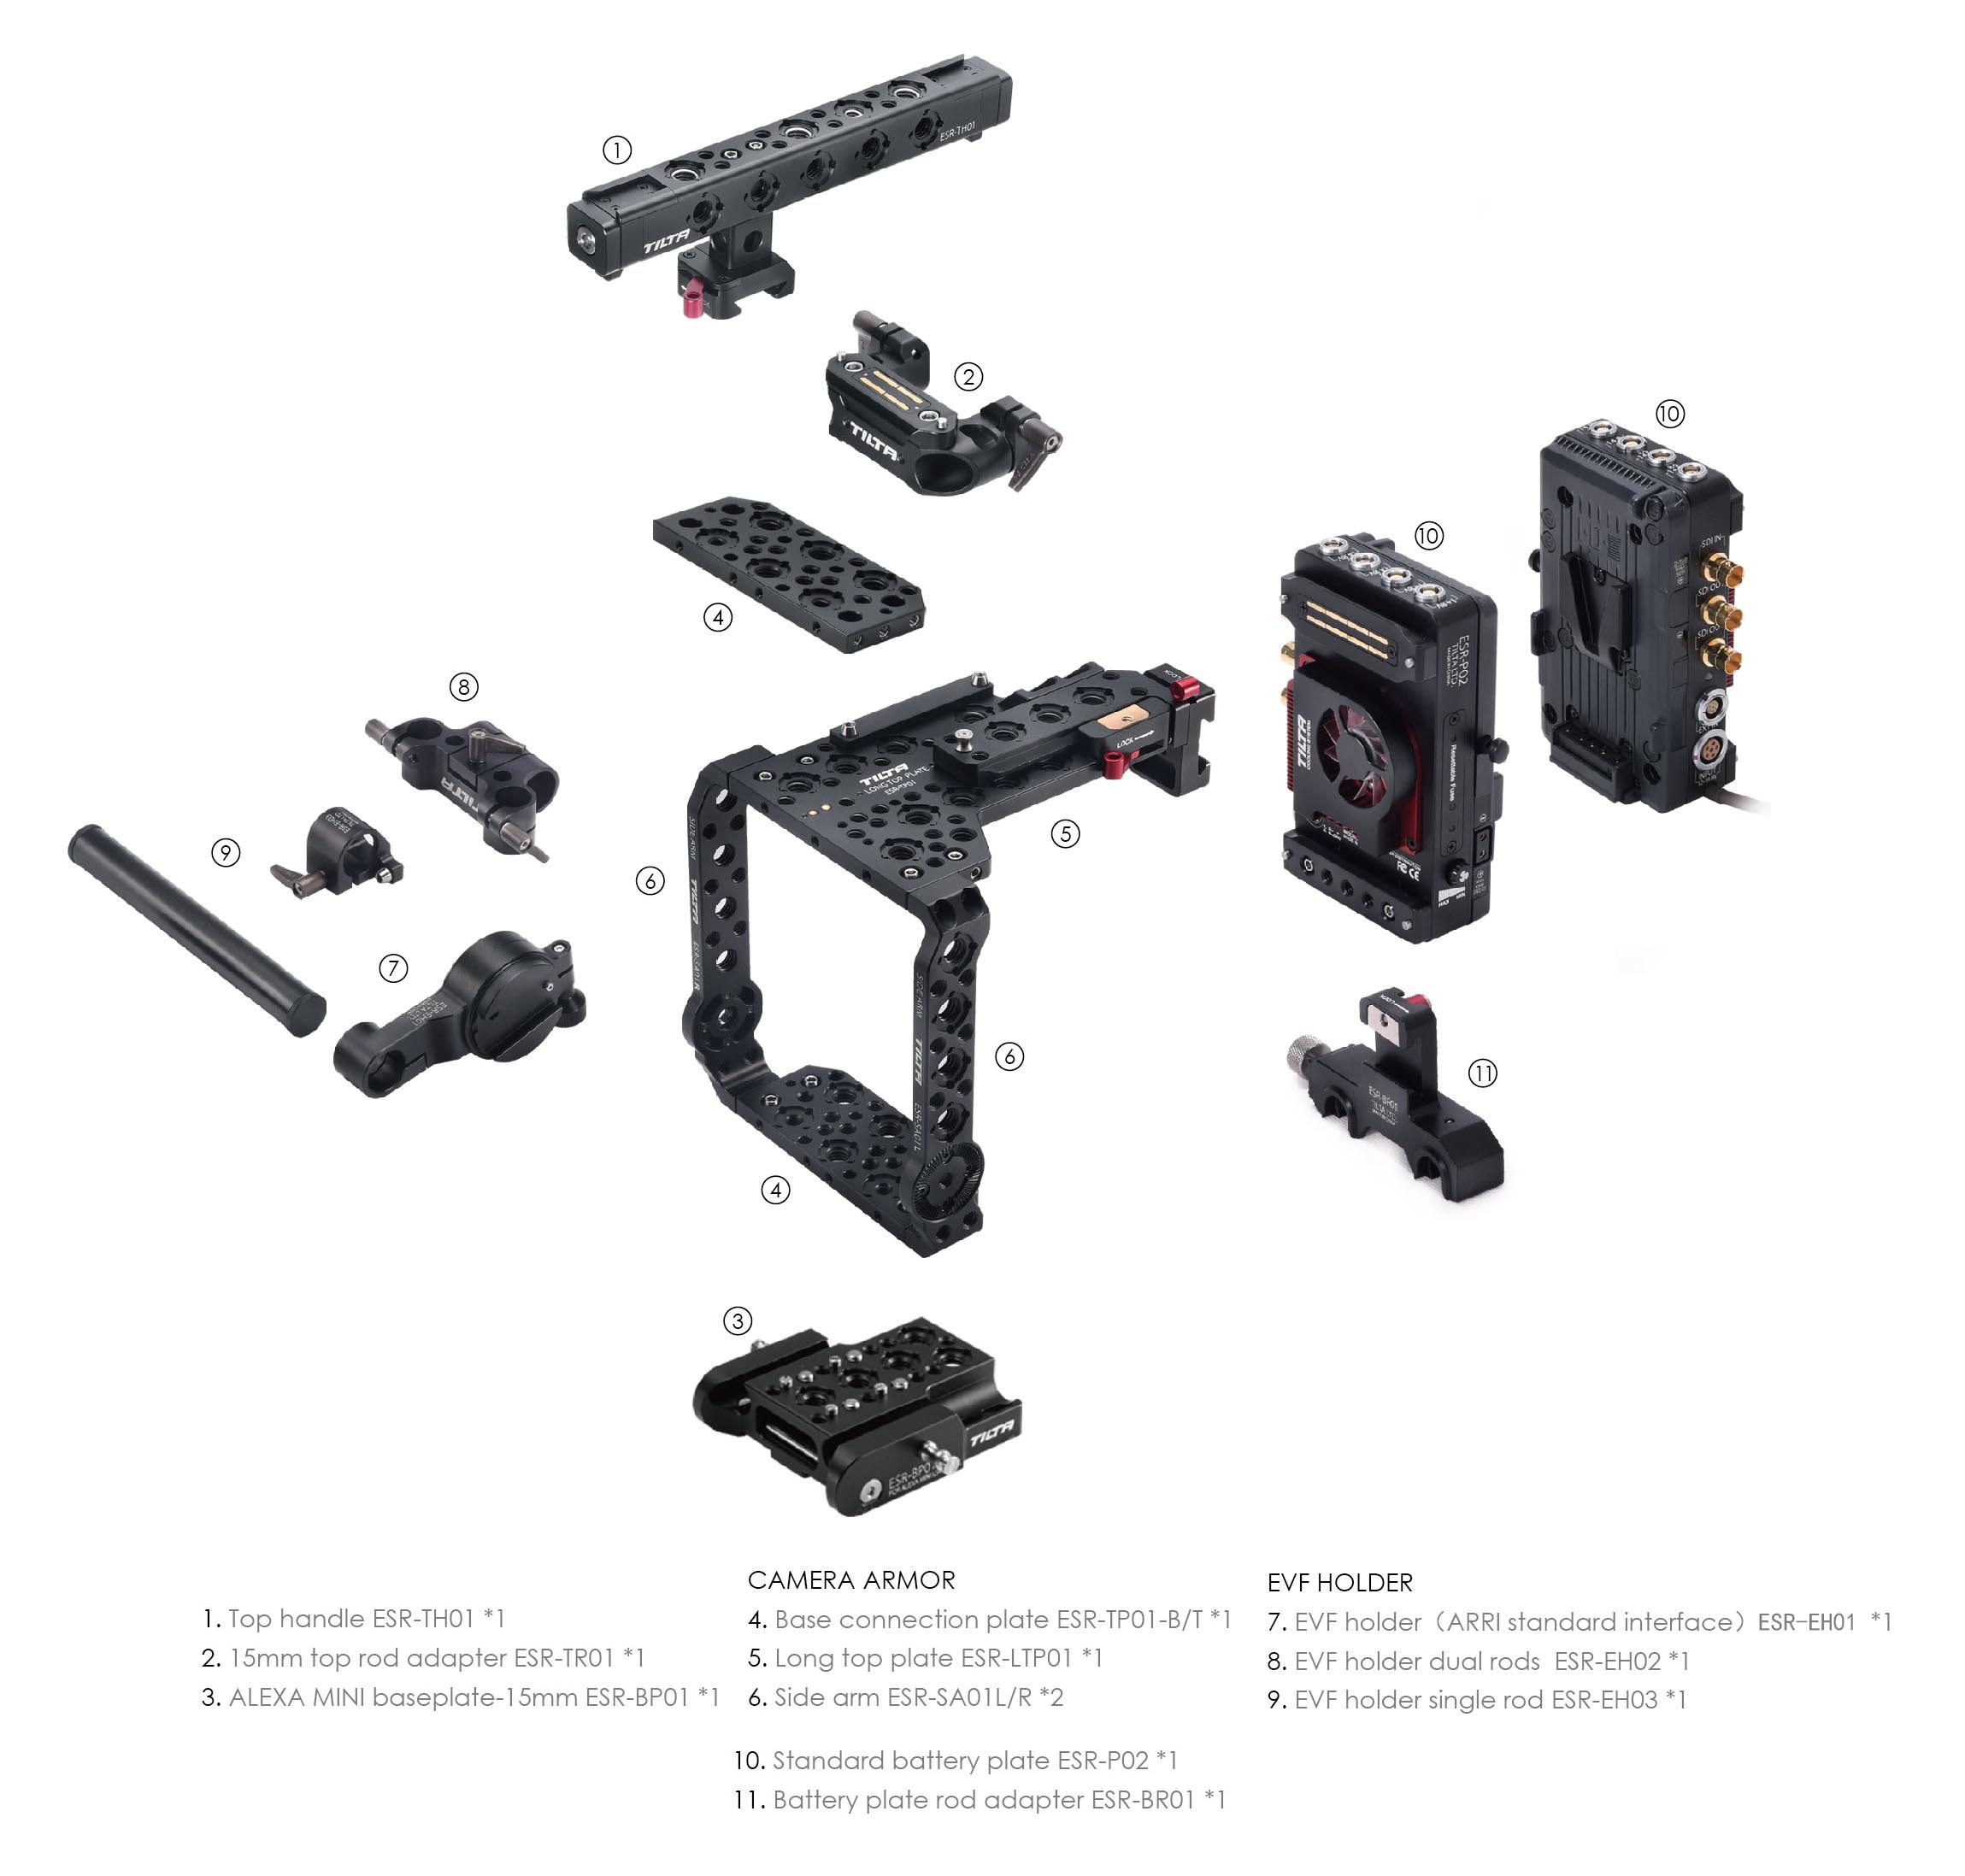
- Determining the necessary accessories. There are a lot of accessories to choose from, but the most important are:
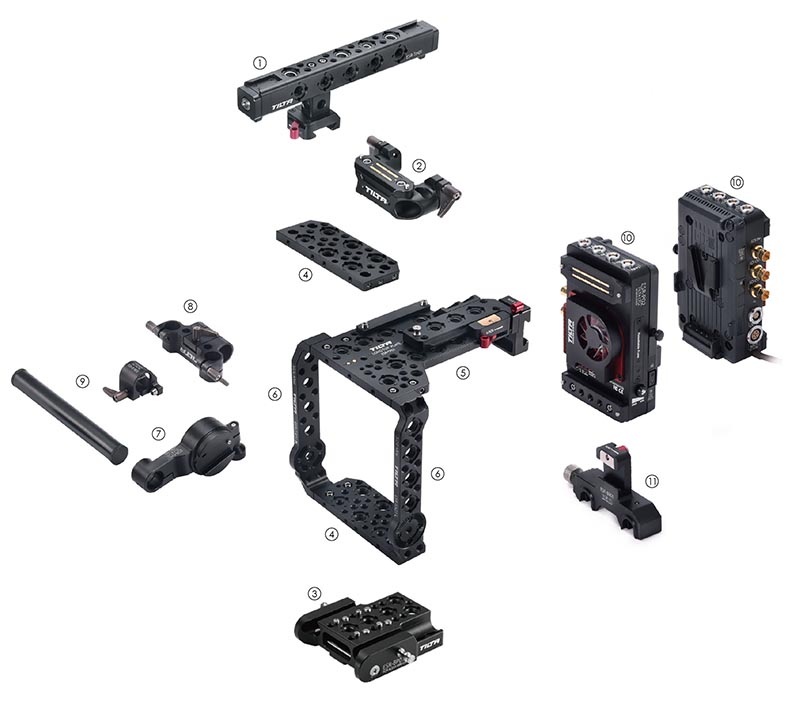 Camera Mount
- External Power (battery)
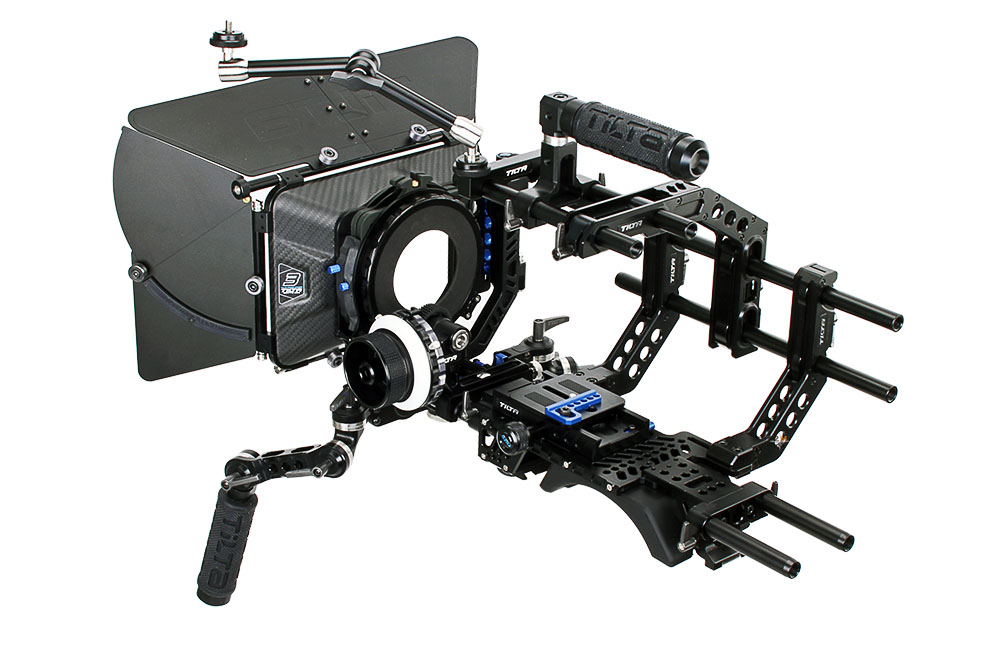
- MatteBox
- Follow Focus
- Handle
- Light
- At second, you need to choose a proper and convenient fitting of the camera itself. There are many choices to choose from. Sometimes is enough a basic bottom plate with the possibility to mount rods (rails), but another time is necessary to choose the entire cage to mount more accessories such as various handles, monitor, EVF, etc...
- The next is the battery. You have to choose the appropriate type of the battery for your camera and its attachment. As long as we have selected the camera fixation and it has the necessary rods, we can choose from the battery handles those that are mounted on the rail. Don't forget on the correct interconnection and the cables between the battery plate and the camera. The battery is usually positioned rearward at the end of the rails as a counterweight (counterbalance) that the center of gravity of the whole RIG is in the RIG mounting position on a tripod or stabilizer or in the center of the shoulder if the RIG is placed on the arm of the cameraman.
- Next follows the choosing of MatteBox and Follow Focus. Both are related to the used lenses. Depending on the type and size of the lens, it is necessary to select the correct MatteBox size and Follow Focus type to fit the MatteBox and Follow Focus to the lens control. By Follow Focus you can choose between manual and wireless. The manual is used when the camera is on the tripod and the focus man is staing by the tripod and wireless in all other cases where a focus man couldn't control the camera directly.
- Now you will need to select the handle for which the cameraman will hold the camera. The upper and lower handles are available. Upper serves when the cameraman makes sticky undercoats and lower handles when a cameraman has a camera on his shoulder. With lower handles, you need to choose a suitable shoulder strap.
- As we choosed the basic parts of the RIG for the camera, now comes the heaviest part of it and how to put all together. That it isn't easy, everything is needed to mount so, that the complete RIG s is balanced. The center of gravity must be located either at the point where the rig is attached to the tripod, by upper hold in the place under that attachment and by the shoulder strap at the top of the arm. When the RIG is mounted on tripod or is used with shoulder strap, in addition to the battery are often used the additional weights for better balancing the RIG.
By following these few basic rules and procedures, you should be able to build a suitable RIG for your camera and DSLR.


If you need the best products, help, support or to make the complete solution, we are here for you.
Payment methods:

